On screen record iPhone is a valuable skill in today’s digital world, and at HOW.EDU.VN, we understand the need for expert guidance. Whether it’s for creating tutorials, capturing gameplay, or preserving important moments, mastering screen recording on your iPhone is essential. Unlock the full potential of your iPhone’s screen recording capabilities with expert advice from top professionals. In this article, we will cover using built-in tools and third-party apps, alongside advanced tips and troubleshooting.
1. Understanding the Basics of iPhone Screen Recording
Screen recording on iPhones has become an indispensable feature for various purposes. Whether you are a content creator, a student, or simply someone who wants to capture and share moments from your screen, understanding the basics is crucial. The screen recording feature on iPhones allows you to record everything happening on your screen, including audio, making it a versatile tool for creating tutorials, capturing gameplay, or documenting important processes.
1.1 What is Screen Recording?
Screen recording involves capturing a video of what is displayed on your device’s screen. This includes any actions you take, such as navigating through apps, watching videos, or playing games. Modern iPhones come with a built-in screen recording feature, making it easy for users to create screen recordings without needing external apps.
1.2 Why Use Screen Recording on iPhone?
There are numerous reasons why you might want to use the screen recording feature on your iPhone:
- Creating Tutorials: Perfect for demonstrating how to use an app or perform a specific task on your phone.
- Capturing Gameplay: Ideal for gamers who want to record and share their gaming sessions.
- Documenting Issues: Useful for showing technical support teams exactly what’s happening on your screen when you encounter a problem.
- Saving Live Streams: You can record live streams or video calls to watch later.
- Educational Purposes: Students and educators can use it to record lectures or create instructional videos.
1.3 Enabling Screen Recording on Your iPhone
Before you can start recording your screen, you need to ensure the screen recording feature is enabled and accessible from your Control Center.
Steps to Enable Screen Recording:
- Open Settings: Go to the Settings app on your iPhone.
- Control Center: Scroll down and tap on “Control Center”.
- Customize Controls: Look for the “Screen Recording” option under the “More Controls” section.
- Add to Control Center: Tap the “+” icon next to “Screen Recording” to add it to your Control Center.
Once added, the screen recording icon will appear in your Control Center, making it easily accessible whenever you need it.
2. Step-by-Step Guide to Screen Recording on iPhone
Now that you have enabled the screen recording feature, let’s walk through the steps to start, stop, and manage your screen recordings.
2.1 Starting a Screen Recording
- Open Control Center: Swipe down from the top-right corner of your screen (on iPhones with Face ID) or swipe up from the bottom of your screen (on iPhones with a Home button) to open the Control Center.
- Tap the Screen Recording Icon: Look for the circular icon with a dot inside (the Screen Recording icon) and tap it.
- Wait for the Countdown: A 3-second countdown will begin. After the countdown, your iPhone will start recording everything on your screen.
- Check the Status Bar: A red bar or icon at the top of your screen indicates that the recording is in progress.
2.2 Recording with or without Audio
You can choose to record your screen with or without audio. Here’s how:
- Without Audio: Simply tap the Screen Recording icon in the Control Center as described above. The recording will capture the video without any sound.
- With Audio:
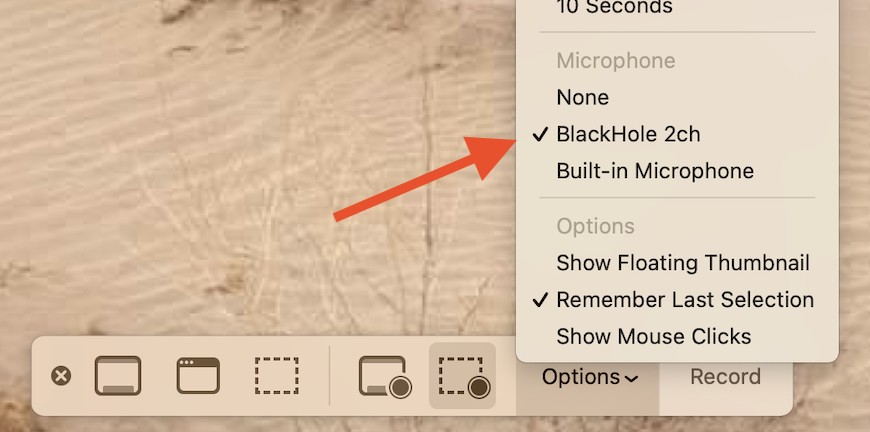
- Long Press the Screen Recording Icon: Instead of a quick tap, press and hold the Screen Recording icon in the Control Center.
- Microphone Option: A menu will appear with a microphone icon. Tap the microphone icon to toggle the audio on or off. When the microphone is on, it will appear red.
- Start Recording: Tap “Start Recording” to begin recording your screen with audio.
2.3 Stopping a Screen Recording
There are several ways to stop a screen recording:
- Tap the Red Status Bar: Tap the red bar or icon at the top of your screen. A prompt will appear asking if you want to stop the recording. Tap “Stop”.
- Open Control Center: Open the Control Center and tap the Screen Recording icon again. This will immediately stop the recording.
2.4 Accessing Your Screen Recordings
Once you stop the recording, it is automatically saved to your Photos app.
- Open Photos App: Go to the Photos app on your iPhone.
- Navigate to Videos: Look for the “Videos” album or simply browse through your recent photos and videos.
- Find Your Recording: Your screen recording will be saved as a video file, ready to be viewed, edited, or shared.
3. Advanced Screen Recording Techniques
Beyond the basics, there are several advanced techniques that can enhance your screen recording experience on your iPhone.
3.1 Using Third-Party Screen Recording Apps
While the built-in screen recording feature is convenient, third-party apps offer additional functionalities and customization options. Some popular apps include:
- TechSmith Capture: Known for its easy-to-use interface and powerful editing tools.
- Record it!: Offers face cam reactions and audio commentary, perfect for creating engaging content.
- Go Record: Provides options to add annotations and custom watermarks to your recordings.
These apps often come with features like video editing, annotation tools, and the ability to record reactions using the front-facing camera.
3.2 Editing Your Screen Recordings
After recording your screen, you might want to edit the video to remove unnecessary parts, add annotations, or enhance the audio.
- Using the Photos App: The built-in Photos app offers basic editing features. You can trim the beginning and end of the video, adjust the exposure, and apply filters.
- iMovie: For more advanced editing, consider using iMovie, Apple’s free video editing app. iMovie allows you to add transitions, text overlays, and background music.
- Third-Party Video Editors: Apps like LumaFusion and Adobe Premiere Rush offer professional-grade editing features on your iPhone.
3.3 Adding Voiceover and Annotations
To make your screen recordings more informative and engaging, consider adding voiceover and annotations.
- Voiceover: Use a voice recording app or video editing software to add a voiceover to your screen recording. This is particularly useful for tutorials and presentations.
- Annotations: Some apps allow you to annotate your screen recordings in real-time or during the editing process. You can draw on the screen, highlight important areas, or add text overlays.
3.4 Optimizing Screen Recordings for Sharing
When sharing your screen recordings, it’s important to optimize them for the platform you’re using.
- Resolution: Adjust the recording resolution to match the platform’s requirements. Lower resolutions are better for faster uploads and smaller file sizes.
- File Format: Export your screen recordings in a widely compatible format like MP4.
- Compression: Use video compression tools to reduce the file size without sacrificing too much quality.
4. Troubleshooting Common Screen Recording Issues
Despite its ease of use, the screen recording feature on iPhones can sometimes encounter issues. Here are some common problems and their solutions.
4.1 Screen Recording Icon Not Showing in Control Center
If you can’t find the screen recording icon in your Control Center, it might not be enabled.
Solution:
- Open Settings: Go to the Settings app on your iPhone.
- Control Center: Tap on “Control Center”.
- Customize Controls: Make sure “Screen Recording” is added to the “Included” section. If it’s not, add it from the “More Controls” section.
4.2 No Audio During Screen Recording
If your screen recording has no audio, ensure that the microphone is enabled.
Solution:
- Open Control Center: Swipe down from the top-right corner of your screen.
- Long Press the Screen Recording Icon: Press and hold the Screen Recording icon.
- Check Microphone: Make sure the microphone icon is red (indicating it’s on). If it’s gray, tap it to turn it on.
4.3 Screen Recording Stops Unexpectedly
Sometimes, screen recordings might stop unexpectedly due to various reasons.
Solutions:
- Check Storage: Ensure your iPhone has enough storage space. Screen recordings can take up a significant amount of space, especially if they are long or high-resolution.
- Close Background Apps: Close any unnecessary apps running in the background to free up resources.
- Restart Your iPhone: A simple restart can often resolve temporary software glitches.
4.4 Black Screen During Screen Recording
A black screen during screen recording can occur if certain apps have restrictions or if there’s a software issue.
Solutions:
- Check App Restrictions: Some apps might prevent screen recording for security reasons. Try recording a different app to see if the issue persists.
- Update iOS: Make sure your iPhone is running the latest version of iOS. Software updates often include bug fixes and improvements that can resolve such issues.
- Reset All Settings: As a last resort, you can try resetting all settings on your iPhone. This will not erase your data but will reset all your settings to their default values. Go to Settings > General > Reset > Reset All Settings.
5. Tips and Tricks for Better Screen Recordings
To create high-quality screen recordings, consider these tips and tricks.
5.1 Plan Your Recording
Before you start recording, plan what you want to show or explain. Create an outline or script to ensure a smooth and coherent recording.
5.2 Minimize Distractions
Turn off notifications and close unnecessary apps to minimize distractions during your recording. Enable “Do Not Disturb” mode to prevent interruptions.
5.3 Use a Clean Background
Choose a clean and uncluttered background for your screen. This will help viewers focus on the content being presented.
5.4 Speak Clearly and Slowly
If you’re adding a voiceover, speak clearly and slowly. Enunciate your words and maintain a steady pace to ensure viewers can easily understand you.
5.5 Edit and Enhance Your Recordings
After recording, take the time to edit and enhance your videos. Trim out unnecessary parts, add annotations, and adjust the audio levels to create a polished final product.
6. Use Cases for iPhone Screen Recording
The screen recording feature on iPhones can be used in a variety of scenarios. Here are some practical use cases.
6.1 Creating App Tutorials
Screen recording is perfect for creating app tutorials. You can demonstrate how to use different features, navigate through the interface, and troubleshoot common issues.
6.2 Recording Mobile Gameplay
Gamers can use screen recording to capture their mobile gameplay and share it with others. Add commentary and reactions to make your gaming videos more engaging.
6.3 Documenting Technical Issues
If you’re experiencing a technical issue with your iPhone or an app, you can use screen recording to document the problem and share it with technical support.
6.4 Creating Educational Content
Educators and students can use screen recording to create educational content. Record lectures, presentations, and demonstrations to share with others.
6.5 Saving Important Moments
You can use screen recording to save important moments, such as live streams, video calls, or ephemeral content on social media.
7. Optimizing Screen Recordings for Different Platforms
When sharing your screen recordings, it’s important to optimize them for the specific platform you’re using.
7.1 YouTube
- Resolution: Use a resolution of 1920×1080 (1080p) or higher for the best quality.
- Aspect Ratio: Maintain a 16:9 aspect ratio.
- File Format: Use MP4 with H.264 video codec and AAC audio codec.
- Bitrate: Use a bitrate of 8-12 Mbps for 1080p videos.
7.2 Instagram
- Resolution: Use a resolution of 1080×1920 for Stories and Reels.
- Aspect Ratio: Maintain a 9:16 aspect ratio.
- File Format: Use MP4 with H.264 video codec and AAC audio codec.
- Duration: Keep your videos under 60 seconds for Reels and 15 seconds for Stories.
7.3 TikTok
- Resolution: Use a resolution of 1080×1920.
- Aspect Ratio: Maintain a 9:16 aspect ratio.
- File Format: Use MP4 with H.264 video codec and AAC audio codec.
- Duration: Keep your videos under 60 seconds for maximum engagement.
7.4 Facebook
- Resolution: Use a resolution of 1280×720 (720p) or higher.
- Aspect Ratio: Maintain a 16:9 aspect ratio.
- File Format: Use MP4 with H.264 video codec and AAC audio codec.
- Bitrate: Use a bitrate of 4-8 Mbps for 720p videos.
8. Best Practices for Audio Quality in Screen Recordings
Good audio quality is essential for creating professional-sounding screen recordings. Here are some best practices to follow.
8.1 Use an External Microphone
The built-in microphone on your iPhone is adequate for basic screen recordings, but an external microphone can significantly improve audio quality. Consider using a USB microphone or a lavalier microphone for clearer and more professional sound.
8.2 Record in a Quiet Environment
Choose a quiet environment for your recording to minimize background noise. Close windows and doors, and turn off any appliances that might cause interference.
8.3 Adjust Microphone Levels
Adjust the microphone levels to ensure that your voice is clear and audible without being too loud or too quiet. Use the audio settings on your iPhone or in your recording app to adjust the input level.
8.4 Use Noise Reduction Tools
Use noise reduction tools in your video editing software to remove any unwanted background noise from your recording. Tools like Audacity and Adobe Audition offer powerful noise reduction features.
8.5 Monitor Your Audio
Monitor your audio while recording to ensure that it sounds good and that there are no issues with the microphone or recording levels. Use headphones to listen to the audio as you record.
9. Screen Recording and Privacy Considerations
When screen recording, it’s important to be mindful of privacy considerations.
9.1 Be Aware of Sensitive Information
Avoid recording sensitive information, such as passwords, credit card numbers, or personal messages. If you need to record such information, blur or redact it in post-production.
9.2 Get Consent When Necessary
If you’re recording other people, get their consent before you start recording. This is especially important for video calls and online meetings.
9.3 Respect Copyright Laws
Be aware of copyright laws when recording content that is not your own. Avoid recording copyrighted material without permission.
9.4 Secure Your Recordings
Protect your screen recordings by storing them securely and limiting access to authorized individuals. Use encryption and password protection to prevent unauthorized access.
9.5 Review and Edit Carefully
Review and edit your screen recordings carefully before sharing them to ensure that there is no sensitive information or inappropriate content.
10. The Future of Screen Recording on iPhones
The screen recording feature on iPhones is likely to evolve in the future with new features and improvements.
10.1 Enhanced Editing Tools
Expect to see more advanced editing tools integrated directly into the screen recording feature. This could include features like automatic noise reduction, AI-powered video enhancement, and more customizable annotation options.
10.2 Improved Audio Quality
Future iPhones may come with improved built-in microphones and audio processing capabilities, resulting in better audio quality for screen recordings.
10.3 Seamless Integration with Other Apps
Look for seamless integration between the screen recording feature and other apps, such as video conferencing tools, social media platforms, and productivity apps.
10.4 Cloud-Based Screen Recording
Cloud-based screen recording services may become more popular, allowing you to store and access your recordings from any device.
10.5 AI-Powered Screen Recording
AI could be used to automatically generate transcripts, captions, and summaries of your screen recordings, making them more accessible and easier to share.
11. How.EDU.VN: Your Partner in Mastering iPhone Screen Recording
At HOW.EDU.VN, we are committed to providing you with the best advice and guidance for mastering iPhone screen recording. Our team of experts is here to help you with any questions or challenges you may encounter.
11.1 Expert Consultations
Connect with our team of seasoned experts for personalized consultations tailored to your specific needs. Whether you’re facing technical issues or seeking advice on optimizing your screen recordings, we’re here to help.
11.2 Comprehensive Resources
Access our extensive library of articles, tutorials, and guides covering all aspects of iPhone screen recording. Learn from the best and stay up-to-date with the latest tips and tricks.
11.3 Community Support
Join our vibrant community of iPhone users and screen recording enthusiasts. Share your experiences, ask questions, and connect with others who are passionate about creating high-quality content.
11.4 Customized Solutions
We understand that every user has unique needs and goals. That’s why we offer customized solutions designed to help you achieve your specific objectives. Whether you’re a content creator, educator, or business professional, we have the expertise to help you succeed.
11.5 Continuous Learning
The world of technology is constantly evolving, and we’re committed to providing you with continuous learning opportunities. Stay ahead of the curve with our regular updates, webinars, and workshops.
12. Success Stories: How Screen Recording Helped Professionals
Real-world examples of professionals benefiting from screen recording on their iPhones.
12.1 Case Study 1: Marketing Manager Enhances Training
- Challenge: A marketing manager struggled to effectively train new team members on using various software tools due to the complexity of remote instructions.
- Solution: By utilizing iPhone screen recording, the manager created concise, step-by-step video tutorials that new hires could follow at their own pace.
- Results: The training time was reduced by 40%, and new team members felt more confident in their abilities.
12.2 Case Study 2: Teacher Simplifies Remote Learning
- Challenge: A teacher needed to explain complex mathematical concepts to students learning remotely, but found it difficult to do so without visual aids.
- Solution: The teacher used screen recording to demonstrate problem-solving techniques and annotate directly on the screen during the recording.
- Results: Student engagement increased by 60%, and comprehension levels improved significantly.
12.3 Case Study 3: IT Support Streamlines Troubleshooting
- Challenge: An IT support team spent excessive time diagnosing technical issues reported by remote employees because they struggled to accurately describe the problems.
- Solution: Employees were instructed to use iPhone screen recording to capture the issues as they occurred, providing the IT team with a clear view of the problems.
- Results: Resolution time for technical issues decreased by 50%, and customer satisfaction improved.
12.4 Case Study 4: Sales Representative Improves Client Communication
- Challenge: A sales representative found it difficult to effectively showcase product features to potential clients over virtual meetings.
- Solution: The sales representative created personalized screen recordings demonstrating how to use the product, addressing specific client needs and questions.
- Results: Conversion rates increased by 30%, and clients reported a better understanding of the product’s value.
12.5 Case Study 5: Project Manager Enhances Team Collaboration
- Challenge: A project manager needed to quickly convey changes to project plans and updates to team members working across different time zones.
- Solution: The project manager used screen recording to provide visual walkthroughs of project documents, highlighting key updates and action items.
- Results: Team alignment improved, and project timelines were met more consistently.
These case studies highlight the versatility and effectiveness of using iPhone screen recording to solve real-world challenges across various industries.
13. Addressing Client Challenges with HOW.EDU.VN
Understanding the common challenges faced by clients seeking expert advice is crucial for delivering tailored solutions. Here’s how HOW.EDU.VN addresses these challenges.
13.1 Challenge: Difficulty Finding Qualified Experts
- Client Need: Access to experts with verified credentials and proven experience.
- HOW.EDU.VN Solution: We connect clients with a curated network of over 100 world-renowned PhDs and specialists, ensuring access to top-tier expertise.
13.2 Challenge: High Costs of Traditional Consulting
- Client Need: Cost-effective solutions that don’t compromise on quality.
- HOW.EDU.VN Solution: Our platform offers competitive pricing models, reducing the financial burden of seeking expert advice.
13.3 Challenge: Concerns About Data Security and Confidentiality
- Client Need: Assurance that their sensitive information is protected.
- HOW.EDU.VN Solution: We employ robust security measures and strict confidentiality protocols to safeguard client data.
13.4 Challenge: Difficulty Articulating Complex Issues
- Client Need: Assistance in clearly defining their problems to receive effective solutions.
- HOW.EDU.VN Solution: Our experts provide guidance and support to help clients articulate their issues effectively, ensuring targeted and relevant advice.
13.5 Challenge: Need for Practical, Actionable Advice
- Client Need: Solutions that can be immediately implemented to achieve tangible results.
- HOW.EDU.VN Solution: Our experts deliver practical, actionable advice that clients can apply to solve their problems and achieve their goals.
13.6 Challenge: Time Constraints in Seeking Expert Consultation
- Client Need: Efficient and timely access to expert consultations without lengthy delays.
- HOW.EDU.VN Solution: We offer streamlined consultation scheduling and prompt responses from our experts, ensuring clients receive timely assistance.
13.7 Challenge: Desire for Personalized and Tailored Advice
- Client Need: Customized solutions that address their specific circumstances and challenges.
- HOW.EDU.VN Solution: Our experts provide personalized advice tailored to each client’s unique situation, ensuring the most effective and relevant guidance.
13.8 Challenge: Ensuring Reliability and Accuracy of Information
- Client Need: Confidence in the accuracy and reliability of the advice they receive.
- HOW.EDU.VN Solution: We verify the credentials and expertise of our consultants, ensuring clients receive accurate and trustworthy information.
13.9 Challenge: Difficulty Accessing a Wide Range of Expertise
- Client Need: A single platform that offers expertise across various domains and disciplines.
- HOW.EDU.VN Solution: Our diverse network of experts spans numerous fields, providing clients with access to a wide range of knowledge and skills.
13.10 Challenge: Need for Ongoing Support and Follow-Up
- Client Need: Continued assistance and follow-up to ensure successful implementation of advice.
- HOW.EDU.VN Solution: We offer ongoing support and follow-up consultations to help clients implement the advice they receive and achieve lasting results.
By addressing these challenges directly, HOW.EDU.VN ensures clients receive the highest quality expert advice and support.
14. Frequently Asked Questions (FAQ) About iPhone Screen Recording
Here are some frequently asked questions about using the screen recording feature on iPhones.
-
How do I start a screen recording on my iPhone?
- Open Control Center, tap the Screen Recording icon, and wait for the countdown.
-
Can I record audio with my screen recording?
- Yes, press and hold the Screen Recording icon in Control Center, then tap the microphone icon to enable audio.
-
How do I stop a screen recording?
- Tap the red bar at the top of your screen or tap the Screen Recording icon in Control Center.
-
Where are my screen recordings saved?
- Screen recordings are saved to the Photos app.
-
Why is there no audio in my screen recording?
- Make sure the microphone is enabled when you start the recording.
-
Can I edit my screen recordings on my iPhone?
- Yes, you can use the built-in Photos app or iMovie for basic editing.
-
How do I share my screen recordings?
- Open the recording in the Photos app and use the share icon to share it via email, social media, or other apps.
-
Why is the screen recording icon not showing in Control Center?
- Go to Settings > Control Center > Customize Controls and add Screen Recording to the Included section.
-
Can I record my screen without showing notifications?
- Enable Do Not Disturb mode before starting the recording to prevent notifications from appearing.
-
What should I do if my screen recording stops unexpectedly?
- Check your iPhone’s storage space, close background apps, and restart your device.
15. Connect with HOW.EDU.VN for Expert Guidance
Ready to take your screen recording skills to the next level? Contact HOW.EDU.VN today for expert guidance and personalized solutions. Our team of experienced professionals is here to help you with all your screen recording needs. Whether you’re a beginner or an advanced user, we have the knowledge and resources to help you succeed.
Don’t struggle with finding the right advice. At HOW.EDU.VN, we connect you directly with over 100 world-renowned PhDs and specialists who are ready to provide tailored solutions to your unique challenges.
Contact us today to learn more about how we can help you master iPhone screen recording.
Address: 456 Expertise Plaza, Consult City, CA 90210, United States
WhatsApp: +1 (310) 555-1212
Website: how.edu.vn