Ear wax blockage can be a nuisance, but don’t worry, you can address it swiftly. Learn more at HOW.EDU.VN. Discover effective and safe methods for quick earwax removal, and understand when to seek professional help.
Earwax, or cerumen, is naturally produced to protect the ear canal, but excess buildup can lead to discomfort and hearing issues. This comprehensive guide provides insights on how to safely and quickly clear earwax blockages, while also discussing preventative measures to maintain optimal ear hygiene.
1. What Is The Fastest Way To Remove Ear Wax Blockage?
The fastest way to remove ear wax blockage often involves using over-the-counter ear drops designed to soften the wax, followed by gentle irrigation. These drops typically contain ingredients like carbamide peroxide or saline, which help break down the earwax. After using the drops, a bulb syringe can be used to gently flush out the softened wax.
Earwax, also known as cerumen, is a natural substance produced by glands in the ear canal to protect the ear from dust, bacteria, and other foreign particles. However, sometimes earwax can build up and harden, leading to a blockage that can cause discomfort, hearing loss, and other symptoms.
1.1. Understanding Earwax
Earwax is composed of a mixture of secretions from sebaceous and ceruminous glands, along with dead skin cells, hair, and debris. Its primary function is to trap foreign particles and prevent them from reaching the eardrum. Earwax also has antibacterial and antifungal properties, which help protect the ear from infections.
1.2. Common Causes of Earwax Blockage
Several factors can contribute to earwax blockage, including:
- Overproduction of earwax: Some individuals naturally produce more earwax than others, making them more prone to blockages.
- Narrow ear canals: People with narrow ear canals may have difficulty naturally expelling earwax.
- Using cotton swabs: Attempting to remove earwax with cotton swabs can often push the wax further into the ear canal, leading to impaction.
- Hearing aids and earplugs: Regular use of hearing aids or earplugs can interfere with the natural process of earwax expulsion.
- Age: As people age, earwax tends to become drier and harder, making it more likely to cause blockages.
1.3. Symptoms of Earwax Blockage
Recognizing the symptoms of earwax blockage is crucial for prompt and effective treatment. Common symptoms include:
- Hearing loss
- Earache
- Feeling of fullness in the ear
- Tinnitus (ringing in the ear)
- Dizziness
- Cough
1.4. Immediate Relief Methods
When experiencing symptoms of earwax blockage, several methods can provide immediate relief:
- Over-the-counter ear drops: Ear drops containing carbamide peroxide or hydrogen peroxide can help soften and break down earwax.
- Warm compress: Applying a warm compress to the ear can help soften the earwax and alleviate discomfort.
- Ear irrigation: Using a bulb syringe with warm water to gently irrigate the ear can help dislodge the earwax.
1.5. The Role of Cerumenolytic Ear Drops
Cerumenolytic ear drops are specifically designed to soften and break down earwax. These drops typically contain ingredients such as:
- Carbamide peroxide: This ingredient releases oxygen, which helps to break up the earwax.
- Hydrogen peroxide: Similar to carbamide peroxide, hydrogen peroxide helps to soften and dissolve earwax.
- Saline solution: Saline solution can help to loosen earwax and facilitate its removal.
- Mineral oil: Mineral oil can help to lubricate the ear canal and soften earwax.
These ear drops can be purchased over the counter and are generally safe for use, but it is essential to follow the instructions carefully.
1.6. Step-by-Step Guide to Using Ear Drops
To effectively use ear drops for earwax removal, follow these steps:
- Tilt your head to the side, so the affected ear is facing up.
- Gently pull your earlobe back and upward to straighten the ear canal.
- Administer the recommended number of ear drops into the ear canal.
- Maintain the tilted position for 5-10 minutes to allow the drops to penetrate the earwax.
- After the recommended time, tilt your head in the opposite direction to allow the ear drops and softened earwax to drain out.
- Gently wipe away any excess liquid with a clean cloth.
- Repeat the process as directed, usually for a few days, until the earwax is fully removed.
1.7. Irrigation Techniques for Fast Removal
Ear irrigation is a method of flushing out earwax using water or a saline solution. It is an effective way to remove softened earwax and can be performed at home with a bulb syringe or an ear irrigation kit.
1.7.1. Using a Bulb Syringe
- Fill the bulb syringe with lukewarm water or a saline solution.
- Tilt your head to the side, so the affected ear is facing up.
- Gently insert the tip of the bulb syringe into the ear canal.
- Squeeze the bulb gently to introduce the water or saline solution into the ear canal.
- Allow the liquid to flow into the ear canal and then drain out into a basin or towel.
- Repeat the process several times until the earwax is dislodged and removed.
1.7.2. Precautions During Irrigation
- Use lukewarm water or saline solution to avoid dizziness or discomfort.
- Avoid inserting the syringe too deeply into the ear canal.
- Do not use excessive force when irrigating the ear.
- If you experience pain, dizziness, or any other unusual symptoms, stop the irrigation immediately and consult a healthcare professional.
1.8. When to Seek Professional Help
While many cases of earwax blockage can be resolved at home, it is essential to seek professional help if:
- You experience severe pain or discomfort.
- You have a history of ear infections or ear surgery.
- You have a perforated eardrum.
- Home remedies are ineffective after several attempts.
- You experience sudden hearing loss or dizziness.
1.9. Professional Removal Methods
Healthcare professionals, such as doctors or audiologists, can use several methods to remove earwax safely and effectively:
- Micro-suction: This involves using a small vacuum device to gently suction out the earwax.
- Curette removal: A curette is a small, spoon-shaped instrument used to manually remove earwax.
- Ear irrigation: Healthcare professionals can perform ear irrigation using specialized equipment and techniques.
1.10. Preventative Measures
Preventing earwax blockage is often more effective than treating it. Here are some preventative measures to consider:
- Avoid using cotton swabs: Cotton swabs can push earwax further into the ear canal, leading to impaction. Instead, gently clean the outer ear with a washcloth.
- Use ear drops regularly: Regular use of ear drops can help to soften earwax and prevent it from building up.
- Keep ears dry: After swimming or showering, dry your ears thoroughly to prevent moisture buildup, which can contribute to earwax blockage.
- Consult a healthcare professional: If you are prone to earwax blockage, consult a healthcare professional for regular check-ups and advice on ear care.
1.11. The Expert Advice at HOW.EDU.VN
At HOW.EDU.VN, our team of expert doctors and specialists are dedicated to providing you with the best advice and solutions for your health concerns. If you are experiencing persistent earwax blockage or have any questions about ear care, we encourage you to reach out to us for personalized guidance and support.
By understanding the causes, symptoms, and treatment options for earwax blockage, you can take proactive steps to maintain healthy ears and prevent future problems.
 Ear Cleaning with Cotton Swab
2. What Home Remedies Can Quickly Clear Earwax?
Several home remedies can quickly clear earwax, including using mineral oil, hydrogen peroxide, or saline solution. These substances help to soften the earwax, making it easier to drain naturally. Warm water irrigation with a bulb syringe after softening the wax can also expedite the process.
Home remedies offer a convenient and often effective way to address earwax buildup. The key is to use these methods safely and understand their limitations. If symptoms persist or worsen, professional medical advice should be sought.
2.1. The Science Behind Home Remedies
The effectiveness of home remedies for earwax removal lies in their ability to soften and loosen the impacted wax. Ingredients like mineral oil, hydrogen peroxide, and saline solution work by lubricating the ear canal and breaking down the hardened wax.
2.2. Safe Application Techniques
When using home remedies, it’s crucial to apply them correctly to avoid injury or infection. Always use lukewarm solutions to prevent dizziness and never insert objects deep into the ear canal.
2.3. Mineral Oil: A Gentle Approach
Mineral oil is a mild and safe option for softening earwax. A few drops of mineral oil can be placed in the ear canal to lubricate the wax, making it easier to dislodge naturally.
2.3.1. How to Use Mineral Oil
- Warm a small amount of mineral oil to body temperature.
- Tilt your head to the side with the affected ear facing up.
- Use a dropper to place 2-3 drops of mineral oil into the ear canal.
- Maintain the tilted position for 5-10 minutes.
- Tilt your head in the opposite direction to allow the oil and softened earwax to drain out.
- Gently wipe away any excess liquid with a clean cloth.
2.4. Hydrogen Peroxide: Bubbling Away the Blockage
Hydrogen peroxide is a common household item that can be used to break down earwax. The bubbling action helps to loosen the wax and facilitate its removal.
2.4.1. Diluting Hydrogen Peroxide
It’s essential to dilute hydrogen peroxide before using it in the ear. A 3% solution of hydrogen peroxide should be mixed with an equal amount of water to create a safer, less irritating solution.
2.4.2. Using Hydrogen Peroxide Safely
- Mix equal parts of 3% hydrogen peroxide and water.
- Tilt your head to the side with the affected ear facing up.
- Use a dropper to place a few drops of the diluted solution into the ear canal.
- You may hear a bubbling sound as the hydrogen peroxide reacts with the earwax.
- Maintain the tilted position for 5 minutes.
- Tilt your head in the opposite direction to allow the solution and softened earwax to drain out.
- Gently wipe away any excess liquid with a clean cloth.
2.5. Saline Solution: A Natural Cleanser
Saline solution, or saltwater, is a gentle and natural way to soften earwax. It helps to loosen the wax and flush it out of the ear canal.
2.5.1. Preparing Saline Solution
You can prepare saline solution by mixing 1 teaspoon of salt with 1/2 cup of warm water. Ensure that the salt is fully dissolved before using the solution in your ear.
2.5.2. Applying Saline Solution
- Prepare a saline solution with warm water and salt.
- Tilt your head to the side with the affected ear facing up.
- Use a dropper or a bulb syringe to gently flush the ear canal with the saline solution.
- Allow the solution to remain in the ear for a few minutes.
- Tilt your head in the opposite direction to allow the solution and softened earwax to drain out.
- Gently wipe away any excess liquid with a clean cloth.
2.6. Warm Water Irrigation: Flushing Out the Wax
Warm water irrigation involves using a bulb syringe to gently flush out softened earwax. This method is most effective after using ear drops or other remedies to soften the wax.
2.6.1. Using a Bulb Syringe for Irrigation
- Fill the bulb syringe with lukewarm water.
- Tilt your head to the side with the affected ear facing up.
- Gently insert the tip of the bulb syringe into the ear canal.
- Squeeze the bulb gently to introduce the water into the ear canal.
- Allow the water to flow into the ear canal and then drain out into a basin or towel.
- Repeat the process several times until the earwax is dislodged and removed.
2.6.2. Important Precautions
- Use lukewarm water to avoid dizziness or discomfort.
- Avoid inserting the syringe too deeply into the ear canal.
- Do not use excessive force when irrigating the ear.
- If you experience pain, dizziness, or any other unusual symptoms, stop the irrigation immediately and consult a healthcare professional.
2.7. Alternative Remedies
Other home remedies include:
- Olive oil: Similar to mineral oil, olive oil can soften earwax and facilitate its removal.
- Glycerin: Glycerin is a humectant that can help to moisturize the ear canal and soften earwax.
- Baby oil: Baby oil is a gentle lubricant that can be used to soften earwax.
2.8. The Role of HOW.EDU.VN Experts
At HOW.EDU.VN, our team of experienced doctors and specialists can provide you with personalized advice on ear care and earwax removal. If you have any concerns about using home remedies or if your symptoms persist, we encourage you to reach out to us for expert guidance and support.
By understanding the science behind home remedies and using them safely, you can effectively clear earwax buildup and maintain healthy ears.
3. Are There Any Natural Oils That Help Remove Earwax Quickly?
Yes, certain natural oils like olive oil, coconut oil, and almond oil can help remove earwax quickly. These oils lubricate and soften the earwax, making it easier to dislodge and drain. Warm the oil slightly before use for better results.
Natural oils offer a gentle and effective way to manage earwax buildup. Their lubricating properties help to soften the wax, making it easier to remove without causing irritation or damage to the ear canal.
3.1. Why Natural Oils Work
Natural oils work by penetrating the earwax, softening it, and lubricating the ear canal. This allows the earwax to move more freely and eventually dislodge on its own or with gentle irrigation.
3.2. Olive Oil: A Time-Tested Remedy
Olive oil is a popular and time-tested remedy for earwax removal. It is safe, readily available, and effective at softening earwax.
3.2.1. Benefits of Olive Oil
- Softens earwax
- Lubricates the ear canal
- Reduces inflammation
3.2.2. How to Use Olive Oil
- Warm a small amount of olive oil to body temperature.
- Tilt your head to the side with the affected ear facing up.
- Use a dropper to place 2-3 drops of warm olive oil into the ear canal.
- Maintain the tilted position for 5-10 minutes.
- Tilt your head in the opposite direction to allow the oil and softened earwax to drain out.
- Gently wipe away any excess liquid with a clean cloth.
3.3. Coconut Oil: A Tropical Solution
Coconut oil has gained popularity for its health benefits, including its ability to soften and remove earwax.
3.3.1. Properties of Coconut Oil
- Antimicrobial properties
- Moisturizing effects
- Softens earwax
3.3.2. Using Coconut Oil for Earwax Removal
- Warm a small amount of coconut oil until it is liquid.
- Tilt your head to the side with the affected ear facing up.
- Use a dropper to place 2-3 drops of warm coconut oil into the ear canal.
- Maintain the tilted position for 5-10 minutes.
- Tilt your head in the opposite direction to allow the oil and softened earwax to drain out.
- Gently wipe away any excess liquid with a clean cloth.
3.4. Almond Oil: A Gentle Lubricant
Almond oil is another natural oil that can be used to soften and remove earwax. It is known for its gentle and moisturizing properties.
3.4.1. Advantages of Almond Oil
- Gentle on the ear canal
- Moisturizing
- Softens earwax
3.4.2. How to Apply Almond Oil
- Warm a small amount of almond oil to body temperature.
- Tilt your head to the side with the affected ear facing up.
- Use a dropper to place 2-3 drops of warm almond oil into the ear canal.
- Maintain the tilted position for 5-10 minutes.
- Tilt your head in the opposite direction to allow the oil and softened earwax to drain out.
- Gently wipe away any excess liquid with a clean cloth.
3.5. Other Natural Oils
Other natural oils that can be used for earwax removal include:
- Baby oil: A gentle and safe option for softening earwax.
- Glycerin: A humectant that helps to moisturize the ear canal and soften earwax.
3.6. Precautions When Using Natural Oils
- Ensure the oil is warmed to body temperature to avoid dizziness or discomfort.
- Do not use excessive amounts of oil.
- Avoid using natural oils if you have a perforated eardrum or any ear infections.
- If you experience pain, dizziness, or any other unusual symptoms, stop the treatment immediately and consult a healthcare professional.
3.7. Expert Guidance from HOW.EDU.VN
At HOW.EDU.VN, our team of experienced doctors and specialists can provide you with personalized advice on using natural oils for earwax removal. If you have any concerns or if your symptoms persist, we encourage you to reach out to us for expert guidance and support.
By understanding the properties of natural oils and using them safely, you can effectively manage earwax buildup and maintain healthy ears.
:max_bytes(150000):strip_icc():format(webp)/GettyImages-877778634-5c6f231246e0fb00013a91c6.jpg)
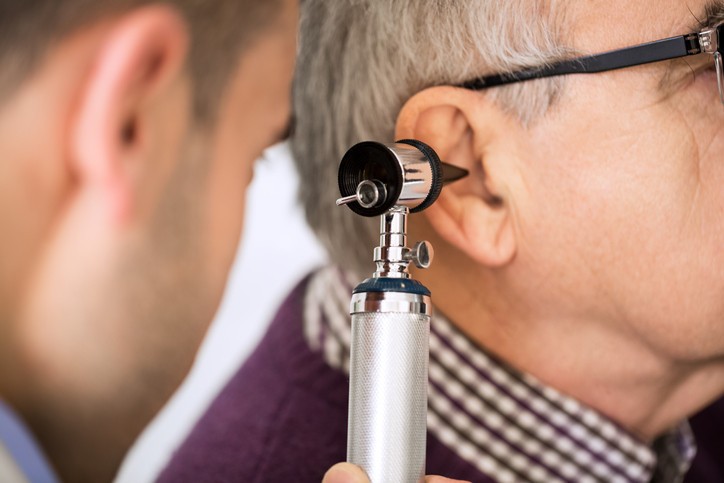
4. When Is Earwax Removal Urgent And Requires A Doctor?
Earwax removal becomes urgent and requires a doctor when you experience sudden hearing loss, severe ear pain, dizziness, or signs of an ear infection. These symptoms may indicate a more serious underlying issue that needs professional medical attention.
Earwax buildup can often be managed with home remedies, but certain situations require the expertise and tools of a medical professional. Recognizing these scenarios is crucial for preventing complications and ensuring proper ear health.
4.1. Symptoms That Warrant Immediate Attention
- Sudden Hearing Loss: A sudden decrease in hearing ability can be alarming and may indicate a severe blockage or other ear-related issue.
- Severe Ear Pain: Intense ear pain is not a typical symptom of earwax buildup and may suggest an infection or injury.
- Dizziness: Dizziness or vertigo can be caused by earwax pressing against the eardrum or affecting the inner ear, requiring medical evaluation.
- Signs of Infection: Symptoms such as fever, swelling, redness, or discharge from the ear may indicate an infection that needs immediate treatment.
4.2. Underlying Medical Conditions
Certain underlying medical conditions can make earwax removal more complicated and necessitate professional intervention.
- Diabetes: Individuals with diabetes are more prone to ear infections and should seek medical advice for earwax removal.
- Compromised Immune System: People with weakened immune systems are at higher risk of developing ear infections and should consult a doctor for earwax management.
- Skin Conditions: Skin conditions such as eczema or psoriasis can affect the ear canal, making earwax removal more challenging and requiring specialized care.
4.3. Previous Ear Surgeries
If you have a history of ear surgeries, it’s essential to seek professional help for earwax removal to avoid complications.
- Tympanoplasty: Surgical repair of the eardrum can make the ear more susceptible to injury during earwax removal.
- Mastoidectomy: Removal of the mastoid air cells can alter the ear’s natural drainage and require careful earwax management.
4.4. Structural Abnormalities
Structural abnormalities of the ear canal can make earwax removal difficult and potentially dangerous.
- Narrow Ear Canals: People with narrow ear canals may have difficulty naturally expelling earwax and require professional cleaning.
- Exostoses: Bony growths in the ear canal can obstruct the natural flow of earwax and necessitate medical intervention.
4.5. When Home Remedies Fail
If home remedies are ineffective after several attempts, it’s time to seek professional help.
- Persistent Blockage: If earwax buildup continues to cause discomfort and hearing loss despite using home remedies, a doctor can provide more effective treatment.
- Worsening Symptoms: If your symptoms worsen or new symptoms develop, it’s essential to consult a healthcare professional.
4.6. Professional Removal Techniques
Doctors and audiologists use several techniques to remove earwax safely and effectively.
- Micro-suction: This involves using a small vacuum device to gently suction out the earwax.
- Curette Removal: A curette is a small, spoon-shaped instrument used to manually remove earwax.
- Ear Irrigation: Healthcare professionals can perform ear irrigation using specialized equipment and techniques.
4.7. The Importance of Early Intervention
Early intervention is crucial for preventing complications and maintaining optimal ear health.
- Preventing Infections: Prompt earwax removal can prevent ear infections and other related issues.
- Restoring Hearing: Removing earwax blockage can restore hearing and improve quality of life.
4.8. Expert Advice from HOW.EDU.VN
At HOW.EDU.VN, our team of experienced doctors and specialists are dedicated to providing you with the best advice and solutions for your ear health concerns. If you are experiencing any of the symptoms mentioned above or have any questions about earwax removal, we encourage you to reach out to us for personalized guidance and support.
By recognizing when earwax removal is urgent and seeking professional help, you can protect your ear health and prevent potential complications.
5. What Are The Risks Of Trying To Remove Earwax At Home?
Trying to remove earwax at home can pose several risks, including pushing the wax further into the ear canal, damaging the eardrum, causing infections, or irritating the sensitive skin of the ear canal. Improper techniques and tools can lead to these complications.
While home remedies can be effective for mild earwax buildup, it’s essential to be aware of the potential risks involved. Using safe practices and recognizing when to seek professional help can prevent complications and ensure proper ear health.
5.1. Pushing Earwax Further In
One of the most common risks of attempting to remove earwax at home is pushing the wax further into the ear canal. This can happen when using cotton swabs or other objects to try to dig out the earwax.
- Impaction: Pushing the earwax deeper can cause it to become impacted, making it more difficult to remove.
- Aggravation of Symptoms: Impaction can worsen symptoms such as hearing loss, earache, and tinnitus.
5.2. Damage to the Eardrum
The eardrum is a delicate membrane that is easily damaged. Inserting objects too deeply into the ear canal can puncture or tear the eardrum.
- Perforation: A perforated eardrum can cause pain, hearing loss, and an increased risk of infection.
- Hearing Loss: Damage to the eardrum can result in permanent hearing loss.
5.3. Ear Infections
Improper earwax removal techniques can introduce bacteria into the ear canal, leading to infections.
- Otitis Externa: Also known as swimmer’s ear, otitis externa is an infection of the outer ear canal.
- Symptoms: Symptoms of an ear infection include pain, redness, swelling, and discharge from the ear.
5.4. Irritation of the Ear Canal
The skin of the ear canal is sensitive and can be easily irritated by harsh chemicals or abrasive objects.
- Inflammation: Irritation can cause inflammation, leading to discomfort and itching.
- Skin Damage: Excessive cleaning or scratching can damage the skin, making it more susceptible to infection.
5.5. Allergic Reactions
Some individuals may be allergic to the ingredients in over-the-counter ear drops or other home remedies.
- Symptoms: Allergic reactions can cause itching, redness, swelling, and rash in and around the ear.
- Anaphylaxis: In rare cases, severe allergic reactions can lead to anaphylaxis, a life-threatening condition.
5.6. Vertigo and Dizziness
Improper earwax removal techniques can disrupt the inner ear, leading to vertigo and dizziness.
- Inner Ear Damage: Damage to the inner ear can affect balance and spatial orientation.
- Symptoms: Symptoms of vertigo include a spinning sensation, nausea, and vomiting.
5.7. When to Avoid Home Removal
There are certain situations when you should avoid attempting to remove earwax at home and seek professional help.
- Perforated Eardrum: If you have a perforated eardrum, home removal techniques can cause further damage.
- Ear Infections: If you have an active ear infection, home removal techniques can worsen the infection.
- Previous Ear Surgery: If you have a history of ear surgery, home removal techniques can cause complications.
5.8. Safe Practices for Home Removal
If you choose to remove earwax at home, it’s essential to follow safe practices.
- Use Ear Drops: Use over-the-counter ear drops to soften the earwax before attempting removal.
- Gentle Irrigation: Use a bulb syringe with warm water to gently irrigate the ear.
- Avoid Cotton Swabs: Avoid using cotton swabs or other objects to dig out the earwax.
5.9. Expert Consultation at HOW.EDU.VN
At HOW.EDU.VN, our team of expert doctors and specialists can provide you with personalized advice on ear care and earwax removal. If you have any concerns about the risks of home removal or if your symptoms persist, we encourage you to reach out to us for expert guidance and support.
By understanding the risks of trying to remove earwax at home and following safe practices, you can protect your ear health and prevent potential complications.
Don’t let earwax blockages disrupt your life. For expert advice and personalized solutions, consult the experienced doctors and specialists at HOW.EDU.VN. Contact us at 456 Expertise Plaza, Consult City, CA 90210, United States, or call us at Whatsapp: +1 (310) 555-1212. Visit our website at how.edu.vn for more information. Our team is ready to help you achieve optimal ear health and overall well-being.