Staining wood is a fantastic way to enhance its natural beauty and protect it, and HOW.EDU.VN is here to guide you. This comprehensive guide offers expert advice on wood staining techniques, ensuring a professional finish every time. Whether you’re a beginner or an experienced DIYer, understanding the proper steps, selecting the right stain, and applying it correctly can transform your woodworking projects. Dive in to learn about wood finishing, wood preparation, and achieving the perfect wood tone.
1. Why Should I Stain Wood? Understanding the Benefits
Wood staining isn’t just about aesthetics; it’s a crucial step in wood preservation and enhancement. Staining offers several key benefits that make it a worthwhile process for any woodworking project.
- Enhancing Natural Beauty: Wood stains accentuate the natural grain and texture of the wood, bringing out its unique characteristics.
- Protection: Staining helps protect the wood from moisture, UV rays, and scratches, extending its lifespan.
- Customization: With a wide range of colors and finishes available, you can customize the look of your wood to match your style and decor.
- Value Addition: Stained wood often looks more refined and expensive, adding value to your furniture or home.
- Uniform Appearance: Staining can help to even out the color variations in different pieces of wood, creating a uniform and cohesive look.
2. What Types of Wood Can Be Stained?
While most types of wood can be stained, some woods take stain better than others. The wood’s density, grain pattern, and natural oils can all affect the staining process.
- Hardwoods: Oak, maple, cherry, and walnut are popular choices for staining due to their tight grain and even texture.
- Softwoods: Pine, fir, and cedar can be stained, but they may require a pre-stain conditioner to prevent blotchiness.
- Exotic Woods: Woods like mahogany, teak, and ipe can be stained, but their natural oils may require special preparation.
| Wood Type | Staining Characteristics | Common Uses |
|---|---|---|
| Oak | Excellent stain absorption, prominent grain | Furniture, flooring |
| Maple | Can be blotchy, requires conditioner | Cabinets, furniture |
| Cherry | Stains beautifully, rich color | Fine furniture |
| Pine | Soft, prone to blotching, use conditioner | Rustic furniture, trim |
3. What Are the Different Types of Wood Stains?
Choosing the right type of wood stain is essential for achieving the desired look and durability. Here’s a breakdown of the different types of stains available:
- Oil-Based Stains: These stains penetrate deeply into the wood, providing rich color and excellent durability. They are ideal for hardwoods and offer a longer open time for application.
- Water-Based Stains: Water-based stains are low in VOCs, making them environmentally friendly. They dry quickly and are easy to clean up.
- Gel Stains: Gel stains are thick and don’t penetrate the wood as deeply as other stains. They are ideal for vertical surfaces, veneers, and non-porous materials like fiberglass or metal.
- Combination Stains: Some stains combine stain and sealant in one product, simplifying the finishing process. These are convenient but may not offer the same level of customization as separate products.
- Varnish Stains: Varnish stains add color and provide a protective finish in one step, making them suitable for projects where durability is a priority.
4. What Tools and Materials Do I Need to Stain Wood?
Before you start staining, gather all the necessary tools and materials. Having everything on hand will make the process smoother and more efficient.
- Wood Stain: Choose the type and color that suits your project.
- Pre-Stain Conditioner: For softwoods or blotch-prone woods.
- Sandpaper: Various grits (120, 180, 220) for surface preparation.
- Sandpaper Block or Orbital Sander: For efficient sanding.
- Tack Cloth: For removing dust after sanding.
- Brushes: Natural or synthetic brushes, depending on the stain type.
- Rags: Lint-free rags for wiping off excess stain.
- Gloves: To protect your hands.
- Safety Glasses: To protect your eyes.
- Drop Cloth: To protect your work area.
- Stir Sticks: For mixing the stain.
- Mineral Spirits or Water: For cleaning brushes, depending on the stain type.
- Sealant or Topcoat: Polyurethane, lacquer, or varnish for added protection.
5. How Do I Prepare the Wood for Staining?
Proper preparation is key to achieving a professional-looking stain. Follow these steps to ensure your wood is ready for staining:
- Clean the Wood: Remove any dirt, grease, or old finishes from the wood surface. Use a cleaner like TSP (trisodium phosphate) if necessary.
- Sand the Wood: Start with a coarser grit sandpaper (120) to remove imperfections, then move to finer grits (180, 220) to smooth the surface. Sand with the grain to avoid scratches.
- Remove Sanding Dust: Use a tack cloth or a vacuum with a brush attachment to remove all sanding dust. Dust particles can interfere with the stain and create an uneven finish.
- Apply Pre-Stain Conditioner: For softwoods or blotch-prone woods, apply a pre-stain conditioner to help the wood absorb the stain more evenly. Follow the manufacturer’s instructions for application and drying time.
6. Step-by-Step Guide: How to Stain Wood
Follow these steps for a flawless wood staining process:
- Test the Stain: Before applying the stain to your project, test it on a scrap piece of wood to ensure you like the color and finish.
- Stir the Stain: Stir the stain thoroughly to ensure the pigment is evenly distributed.
- Apply the Stain: Use a brush, rag, or foam applicator to apply the stain to the wood. Work in the direction of the grain and apply a thin, even coat.
- Wipe Off Excess Stain: After a few minutes (check the manufacturer’s instructions for the recommended time), use a clean, lint-free rag to wipe off any excess stain. This will help prevent the stain from becoming too dark or blotchy.
- Allow to Dry: Let the stain dry completely according to the manufacturer’s instructions. Drying times can vary depending on the type of stain and environmental conditions.
- Apply a Second Coat (Optional): If you want a darker color, apply a second coat of stain following the same steps as above.
- Seal the Stain: Once the stain is dry, apply a sealant or topcoat to protect the wood and enhance its durability. Polyurethane, lacquer, and varnish are all good options.
7. What Are Some Tips for Achieving an Even Stain?
Achieving an even stain can be tricky, but these tips can help:
- Use a Pre-Stain Conditioner: As mentioned earlier, pre-stain conditioners are essential for softwoods and blotch-prone woods.
- Sand Evenly: Uneven sanding can lead to uneven stain absorption. Take your time and ensure the surface is smooth and uniform.
- Apply Thin Coats: Applying thin, even coats of stain is better than applying one thick coat. This allows you to control the color and prevent blotchiness.
- Work Quickly: Stains can dry quickly, so work in small sections and wipe off the excess stain before it starts to dry.
- Use the Right Applicator: Different applicators can produce different results. Experiment with brushes, rags, and foam applicators to see which works best for you.
- Maintain Consistent Pressure: When wiping off the excess stain, use consistent pressure to ensure an even removal.
8. How Do I Fix Common Staining Problems?
Even with careful preparation and application, staining problems can sometimes occur. Here’s how to fix some common issues:
- Blotchiness: If the stain looks blotchy, it’s likely due to uneven absorption. Try using a pre-stain conditioner or sanding the wood more thoroughly.
- Uneven Color: Uneven color can be caused by inconsistent application or wiping. Try applying another thin coat of stain, paying close attention to evenness.
- Too Dark: If the stain is too dark, try sanding it lightly and applying a lighter stain. You can also try wiping the stain off more quickly.
- Too Light: If the stain is too light, apply another coat of stain, allowing it to sit for a longer period before wiping off the excess.
- Streaks: Streaks can be caused by improper wiping or using a dirty rag. Use a clean, lint-free rag and wipe in the direction of the grain.
9. What Are Some Advanced Staining Techniques?
For those looking to take their staining skills to the next level, here are some advanced techniques:
- Layering Stains: Layering different stain colors can create depth and dimension. Apply one color, let it dry, then apply another color on top.
- Antiquing: Antiquing involves applying a dark stain or glaze and then wiping it off to create an aged look. This technique is popular for furniture and decorative items.
- Distressing: Distressing involves physically damaging the wood to create a weathered appearance. This can be done with tools like chains, hammers, or sandpaper.
- Color Matching: Color matching involves blending different stain colors to achieve a specific hue. This requires practice and a good eye for color.
- Using Wood Dyes: Wood dyes penetrate the wood more deeply than stains, providing vibrant and transparent colors. They are often used for musical instruments and fine furniture.
10. How To Paint and Stain Wood: A Detailed Guide
Combining paint and stain can create unique and visually appealing finishes. Here’s a detailed guide on how to paint and stain wood effectively:
- Preparation is Key: Start by cleaning the wood surface thoroughly to remove any dirt or grease.
- Sanding: Sand the wood to create a smooth surface. Use a medium-grit sandpaper (120-150) for the initial sanding, followed by a fine-grit sandpaper (220) for the final smoothing.
- Priming (If Necessary): If you’re painting a porous wood or one with knots, apply a primer to ensure even paint adhesion.
- Painting: Apply the paint in thin, even coats. Allow each coat to dry completely before applying the next. For best results, use a high-quality brush or a paint sprayer.
- Sanding Between Coats: Lightly sand the painted surface with fine-grit sandpaper between coats to remove any imperfections and create a smoother finish.
- Masking: Use painter’s tape to mask off the areas you want to stain. This will ensure clean lines and prevent the stain from bleeding onto the painted surface.
- Staining: Apply the wood stain to the unpainted areas using a brush, rag, or foam applicator. Work in the direction of the wood grain.
- Wiping Off Excess Stain: After a few minutes, wipe off any excess stain with a clean, lint-free rag. This will prevent the stain from becoming too dark or blotchy.
- Drying: Allow the stain to dry completely according to the manufacturer’s instructions.
- Sealing: Apply a sealant or topcoat to protect both the painted and stained surfaces. Polyurethane, lacquer, or varnish are all good options.
Materials You’ll Need:
- Wood cleaner
- Sandpaper (medium and fine grit)
- Primer (optional)
- Paint (high-quality)
- Wood stain
- Painter’s tape
- Brushes, rags, or foam applicators
- Sealant or topcoat
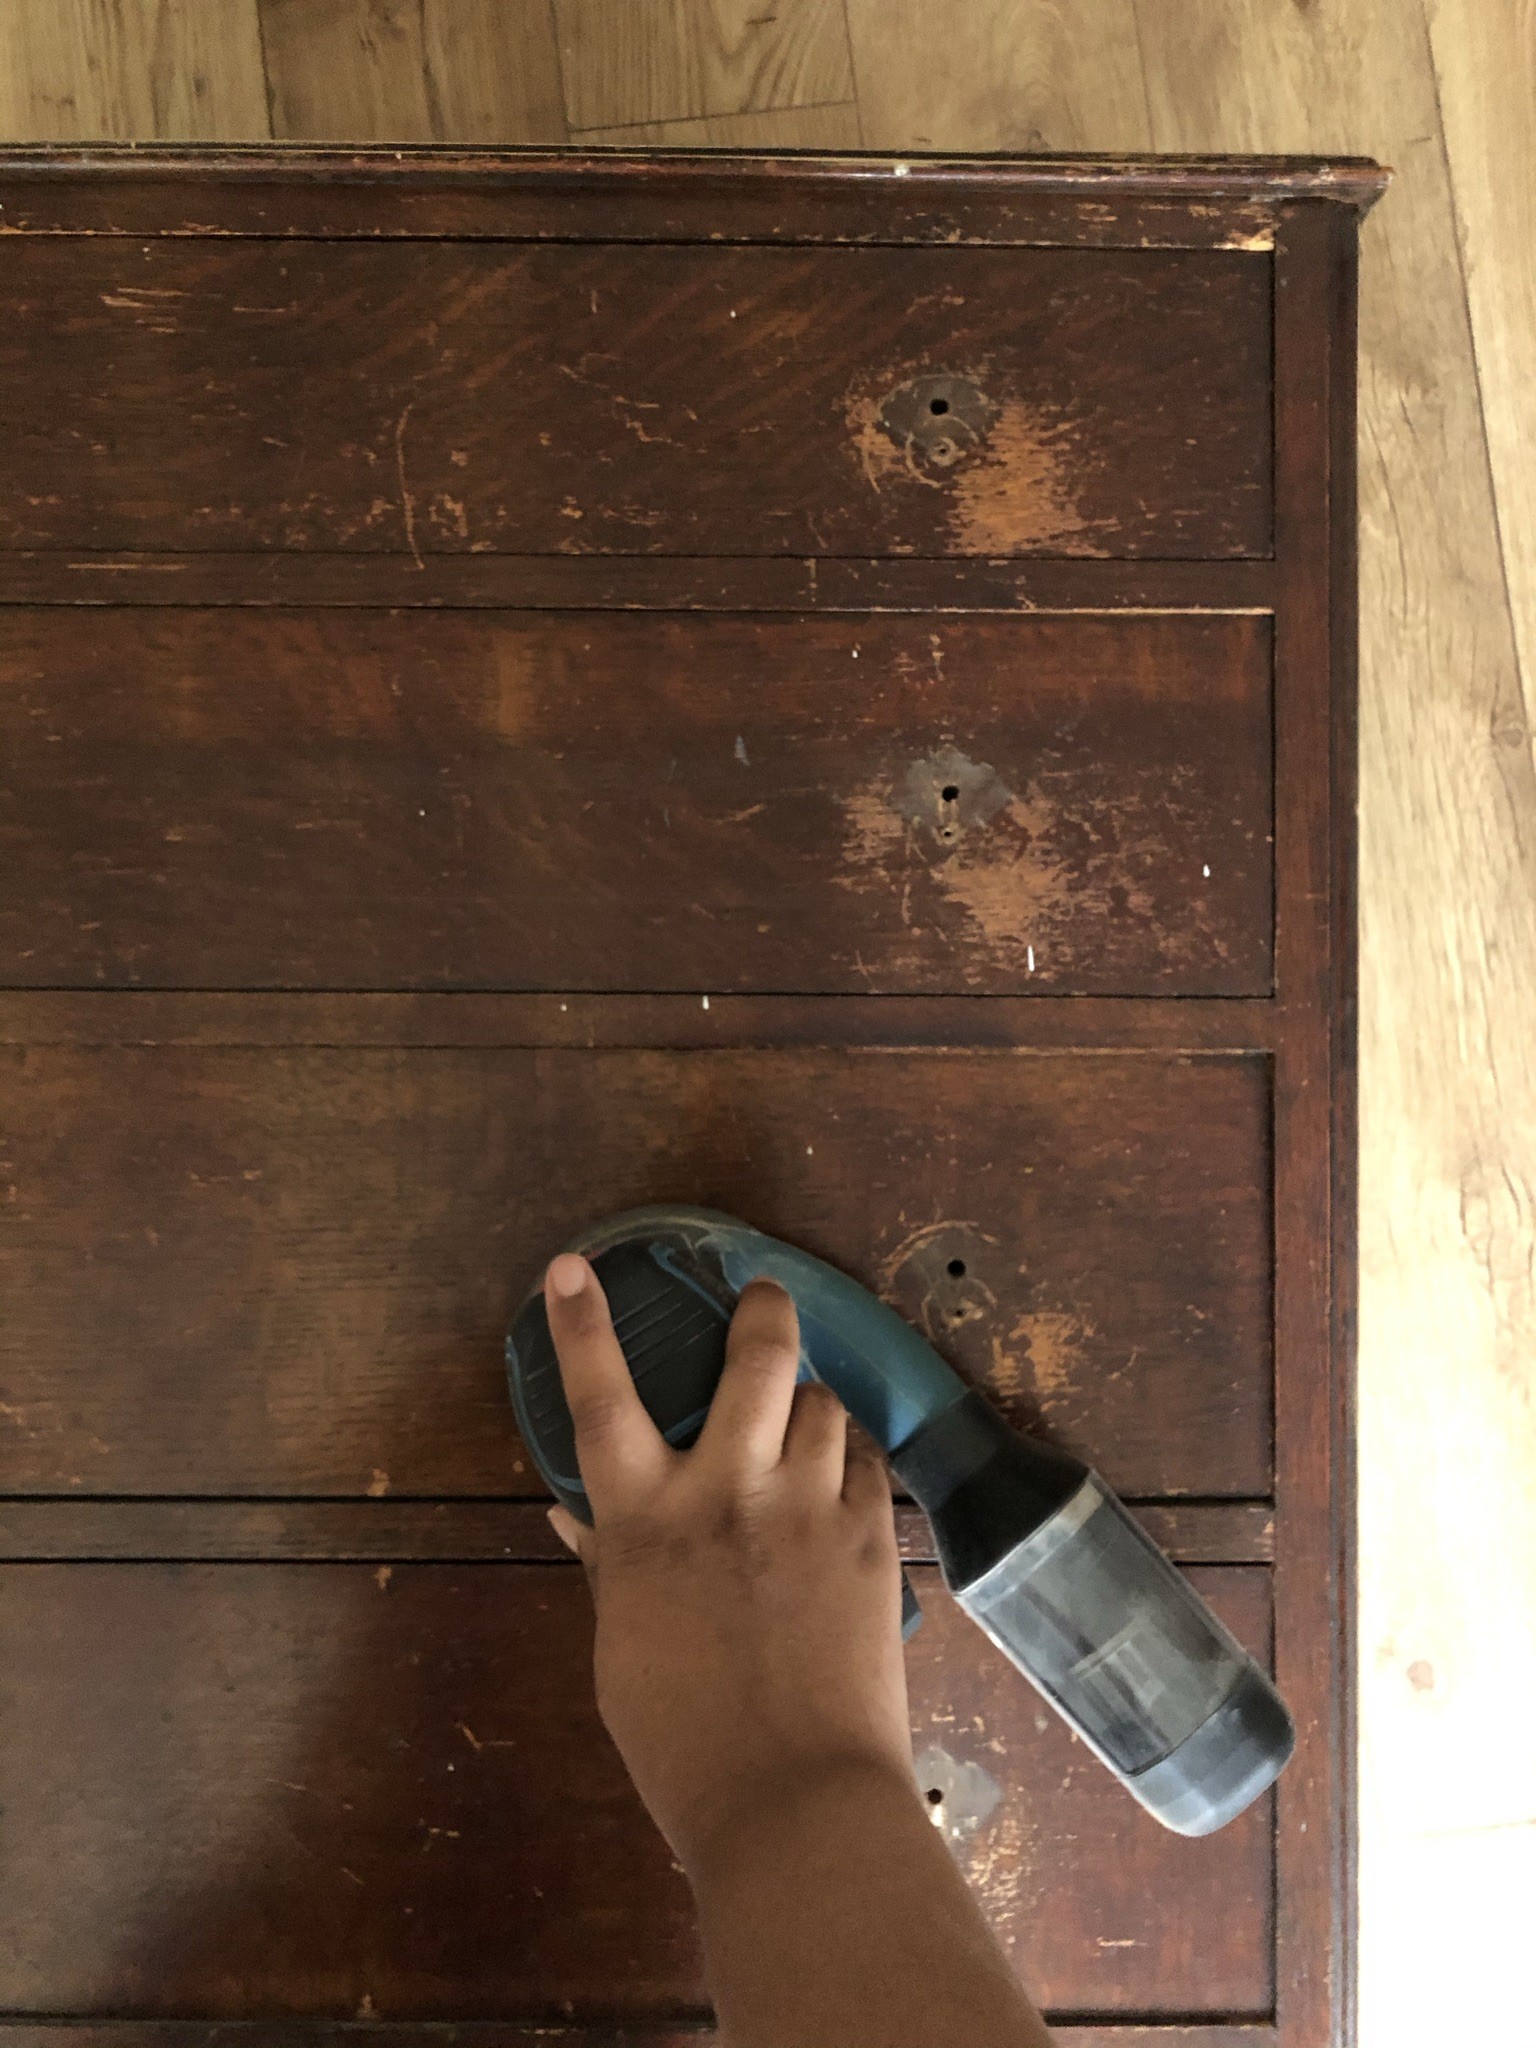 Before close up shot dated dresser sander
11. Safety Tips for Staining Wood
Staining wood involves working with chemicals that can be harmful if not handled properly. Follow these safety tips to protect yourself:
- Work in a Well-Ventilated Area: Stains and sealants can release harmful fumes, so work in a well-ventilated area or wear a respirator.
- Wear Gloves and Safety Glasses: Protect your skin and eyes from contact with stains and sealants.
- Dispose of Rags Properly: Oily rags can spontaneously combust, so dispose of them properly. Lay them flat to dry, then place them in a metal container with a lid.
- Read and Follow Manufacturer’s Instructions: Always read and follow the manufacturer’s instructions for the stains, sealants, and other products you are using.
- Keep Products Out of Reach of Children and Pets: Store stains, sealants, and other chemicals in a secure location where children and pets cannot access them.
12. How Do I Maintain Stained Wood?
Proper maintenance can keep your stained wood looking beautiful for years to come. Here are some tips:
- Clean Regularly: Dust and clean your stained wood furniture regularly with a soft cloth and a mild cleaner.
- Avoid Harsh Chemicals: Avoid using harsh chemicals or abrasive cleaners, as they can damage the finish.
- Protect from Sunlight: Prolonged exposure to sunlight can fade the stain, so protect your stained wood furniture from direct sunlight.
- Touch Up Scratches: Touch up scratches and minor damage with a stain pen or a small amount of stain.
- Reapply Topcoat: Reapply the topcoat every few years to protect the wood and keep it looking its best.
13. Environmental Considerations for Wood Staining
When staining wood, it’s essential to consider the environmental impact of the products you use. Here are some environmental considerations:
- Choose Low-VOC Products: Select stains and sealants with low or zero VOC (volatile organic compounds) content to reduce air pollution.
- Water-Based Stains: Opt for water-based stains, as they generally have lower VOC levels compared to oil-based stains.
- Proper Disposal: Dispose of leftover stains, sealants, and contaminated materials according to local regulations. Do not pour them down the drain.
- Sustainable Wood: Use wood from sustainable sources to support responsible forestry practices. Look for certifications like FSC (Forest Stewardship Council).
- Reduce Waste: Purchase only the amount of stain and sealant needed for your project to minimize waste.
14. Wood Staining for Different Projects
The specific techniques and products used for wood staining can vary depending on the type of project. Here are some tips for different projects:
- Furniture: For furniture, choose a durable stain and sealant that can withstand daily use. Consider using a gel stain for vertical surfaces.
- Flooring: For flooring, select a stain that is resistant to wear and tear. Apply multiple coats of sealant for added protection.
- Cabinets: For cabinets, use a stain that matches your kitchen or bathroom décor. Consider using a combination stain and sealant for convenience.
- Outdoor Projects: For outdoor projects, choose a stain and sealant that are designed to withstand the elements. Look for products that are UV-resistant and water-resistant.
- Small Crafts: For small crafts, experiment with different stain colors and techniques to create unique and personalized items.
15. Creative Ideas for Wood Staining
Wood staining offers endless possibilities for creative expression. Here are some ideas to inspire your next project:
- Ombre Effect: Create an ombre effect by gradually blending different shades of stain.
- Geometric Patterns: Use painter’s tape to create geometric patterns with stain.
- Stencils: Use stencils to add decorative designs to your stained wood projects.
- Burning Techniques: Combine wood staining with wood burning for a unique and artistic look.
- Mixed Media: Combine wood staining with other materials like metal, glass, or fabric for a mixed-media project.
16. Case Studies: Successful Wood Staining Projects
To illustrate the impact of proper wood staining, here are some case studies:
- Reviving Old Furniture: A homeowner used wood stain to restore an old dresser, transforming it from a worn-out piece into a beautiful focal point in their bedroom.
- Customizing Kitchen Cabinets: A kitchen renovation project used stain to match new cabinets with existing wood trim, creating a cohesive and stylish design.
- Creating Unique Home Decor: A DIY enthusiast used various staining techniques to create personalized home decor items, adding a unique touch to their living space.
- Restoring Hardwood Floors: A homeowner refinished their hardwood floors with stain, bringing out the natural beauty of the wood and increasing the value of their home.
- Building Outdoor Furniture: A woodworker used stain to protect and enhance outdoor furniture, ensuring it withstands the elements and lasts for years.
17. Expert Interviews: Insights from Wood Finishing Professionals
To provide deeper insights into wood staining, we interviewed several wood finishing professionals:
- John Smith, Furniture Restorer: “Proper sanding and preparation are crucial for achieving an even stain. Always take your time and don’t skip steps.”
- Emily Johnson, Interior Designer: “Stain can transform a space by bringing out the warmth and beauty of natural wood. It’s an essential element in design.”
- David Brown, Woodworker: “Experiment with different stains and techniques to find what works best for you. Wood finishing is an art form.”
- Sarah Green, DIY Blogger: “Don’t be afraid to try new things. With a little practice, anyone can achieve professional-looking results.”
- Michael Clark, Flooring Specialist: “Choosing the right sealant is just as important as choosing the right stain. Protect your investment with a high-quality finish.”
18. Trends in Wood Staining
The world of wood staining is constantly evolving with new techniques, products, and trends. Here are some current trends:
- Natural and Organic Finishes: A growing interest in natural and eco-friendly wood finishes.
- Gray and Neutral Tones: A shift towards gray and neutral-toned stains for a modern and sophisticated look.
- Reclaimed Wood Looks: Techniques to mimic the appearance of reclaimed wood through staining and distressing.
- Bold and Colorful Stains: Experimentation with bold and vibrant stain colors for unique and eye-catching projects.
- Combination Finishes: Combining different staining techniques and materials to create custom and personalized finishes.
19. Common Myths About Wood Staining
There are several misconceptions about wood staining that can lead to confusion. Here are some common myths debunked:
- Myth: All woods stain the same way.
- Reality: Different woods have different densities and grain patterns, which affect how they absorb stain.
- Myth: More coats of stain always mean a darker color.
- Reality: Applying too much stain can lead to blotchiness. It’s better to use a darker stain if you want a richer color.
- Myth: You don’t need to sand before staining.
- Reality: Sanding is essential for creating a smooth surface and ensuring even stain absorption.
- Myth: Any sealant will work over any stain.
- Reality: Some sealants are not compatible with certain stains. Always check the manufacturer’s recommendations.
- Myth: Staining is only for aesthetics.
- Reality: Staining also provides protection against moisture, UV rays, and scratches.
20. FAQ: Your Wood Staining Questions Answered
Here are some frequently asked questions about wood staining:
- What is the best way to prepare wood for staining?
- The best way to prepare wood for staining is to clean it thoroughly, sand it to a smooth finish, and apply a pre-stain conditioner if necessary.
- How do I prevent blotchiness when staining softwoods?
- To prevent blotchiness when staining softwoods, use a pre-stain conditioner to help the wood absorb the stain more evenly.
- What is the difference between oil-based and water-based stains?
- Oil-based stains penetrate deeply into the wood and offer excellent durability, while water-based stains are low in VOCs and dry quickly.
- How many coats of stain should I apply?
- The number of coats of stain you should apply depends on the desired color intensity. Start with one coat and add more if needed.
- How long should I let the stain dry before applying a sealant?
- You should let the stain dry completely before applying a sealant, according to the manufacturer’s instructions.
- What is the best type of sealant to use over stain?
- The best type of sealant to use over stain depends on the project. Polyurethane, lacquer, and varnish are all good options.
- How do I fix scratches in stained wood?
- You can fix scratches in stained wood with a stain pen or a small amount of stain.
- How do I clean stained wood furniture?
- Clean stained wood furniture regularly with a soft cloth and a mild cleaner.
- Can I stain over existing finishes?
- You can stain over existing finishes, but you will need to sand them down first to create a smooth surface for the stain to adhere to.
- What safety precautions should I take when staining wood?
- When staining wood, work in a well-ventilated area, wear gloves and safety glasses, and dispose of rags properly.
Wood staining is an art that combines technique, knowledge, and creativity. By following these guidelines, you can achieve professional-looking results and transform your woodworking projects into stunning works of art. Whether you’re restoring furniture, customizing cabinets, or creating unique home décor, wood staining is a rewarding skill that will enhance your craftsmanship and add value to your creations.
If you’re facing challenges in your wood staining project or need expert advice, don’t hesitate to reach out to the professionals at HOW.EDU.VN. Our team of experienced PhDs is ready to provide personalized guidance and solutions to help you achieve the perfect finish.
Contact us today for expert assistance:
Address: 456 Expertise Plaza, Consult City, CA 90210, United States
WhatsApp: +1 (310) 555-1212
Website: HOW.EDU.VN
Let how.edu.vn help you unlock the full potential of your wood staining projects with confidence and expertise.